Clips are a great way to capture exciting, funny or interesting highlights from a stream – either on Twitch itself or to share with the world on social media. If you're unsure what they are and how to use them – here's everything you need to know.
What are Twitch clips?
Twitch clips are short video clips, typically under a minute long, that highlight specific moments from a live stream on the Twitch platform. The unique thing about clips on Twitch is that anyone can make them – not just the streamer, but any viewer as well.
What are Twitch clips used for?
Twitch clips can be used for a variety of purposes, including:
- Sharing memorable moments: Clips are a great way to share funny or exciting moments from the stream with friends or on social media.
- Promotion: Streamers can use clips to promote their channel by highlighting their best moments or showcasing their skills and viewers can make their own clips from streams and share them easily.
- Engagement: Clips can help drive engagement by encouraging viewers to interact with the content and share their own clips.
- Content creation: Clips can be used as a source of inspiration for creating new content, such as compilations or montages.
How to clip on Twitch
Making clips on Twitch is easy. Here's how you do it:
- Navigate to the stream or video that you want to clip.
- Hover your mouse over the video player and look for the Clip button. Tip: You can also use the keyboard shortcuts ALT + X on Windows or ⌥ + X on Mac.
- Click the Clip button to open the clip creation interface.
- Drag the sliders to select the portion of the stream or video that you want to clip.
- Give your clip a title and add any necessary context or commentary.
- Click the Publish button to create your clip.
Once your clip is published, you can share it on social media or embed it on your own website. Your clip will also be added to the "Clips" section of the stream or video that you clipped from, so other viewers can discover it and watch it as well. Streamers can manage their clips in the Clip Manager.
Note that some channels may have clip creation disabled, in which case you won't be able to create clips from their streams or videos.
How to improve your Twitch clips for social media
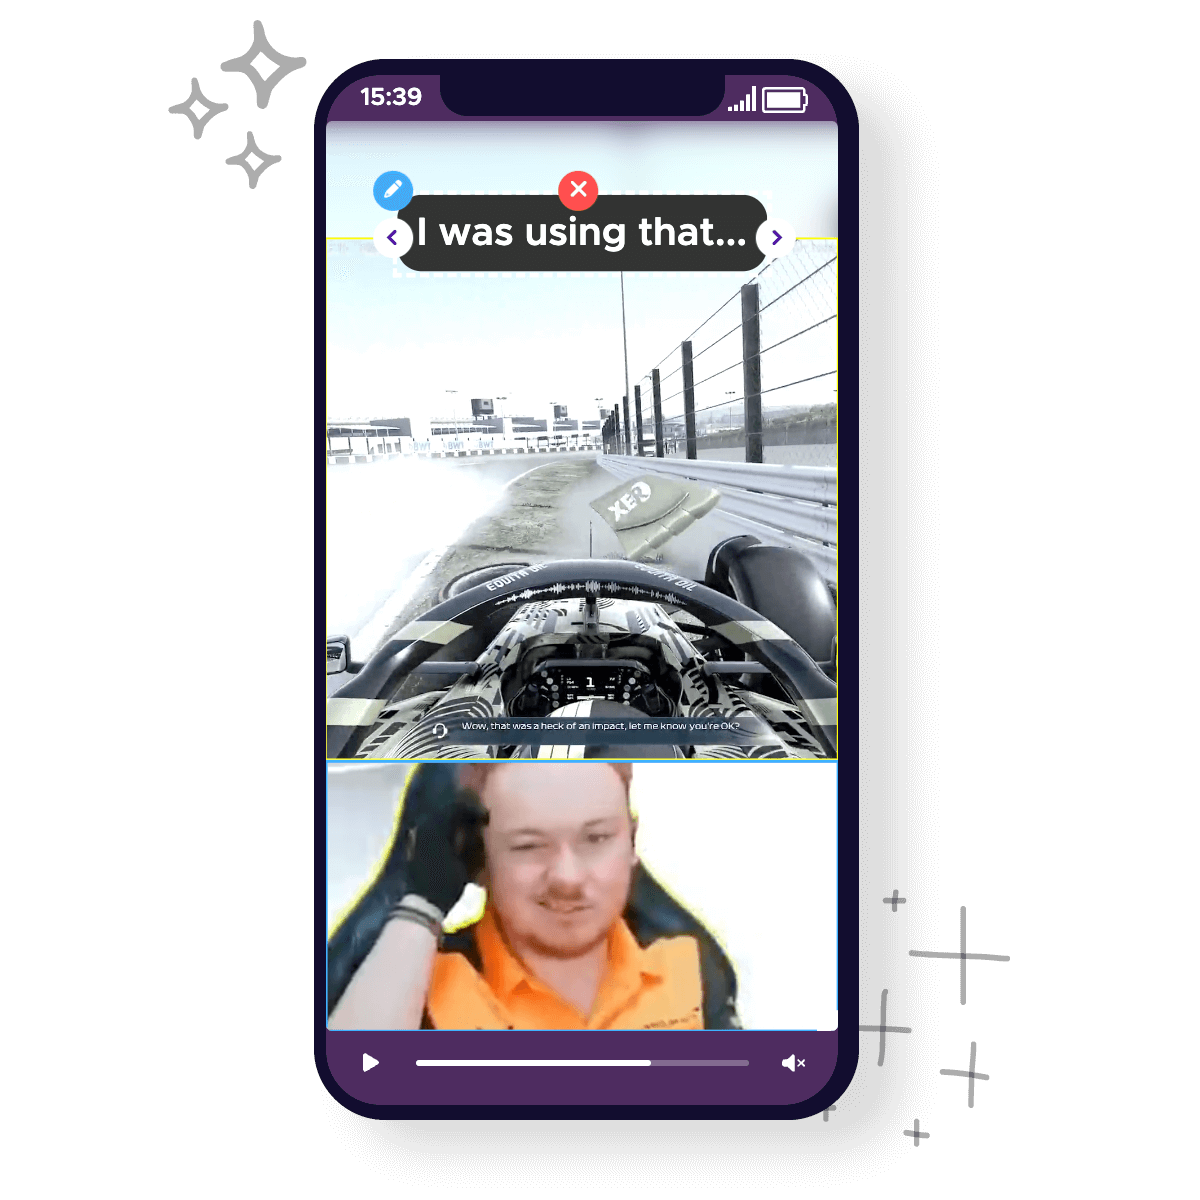
If you want to post your clip to TikTok, YouTube Shorts or any other social media platform, you will probably need to edit the video. For one – the aspect ratios for Twitch and TikTok are wildly different. You can use StreamLadder to turn the video from landscape to portrait, with different options to show the game feed and face cam. The basic version is free and doesn't have a watermark covering all the action. With an upgrade, you can also add text, stickers and automatically generate captions for your video to reach an even bigger audience.
There you have it – everything you need to know about clips on Twitch. Are you ready to turn your Twitch clips into the perfect social media content? Go to StreamLadder.com to get started.